Looking for a weekend project? This is a great activity for kids and adults alike! For this holiday weekend, make some special butter to elevate your Easter brunch game.
In the Southern Appalachian Mountains, most families owned only a few cows. Because of the terrain, cows were more difficult to care for, so instead of raising cows for beef (which would mean raising a lot of cows!), people kept cows for dairy. This meant that they had to milk their cows daily in order to keep getting raw milk which they could turn into important foods like cheese and butter.
While you can make butter straight from milk (known as sweet cream butter), the best tasting butter is cultured first. Think creamy with a hint of tanginess, with all the melty golden goodenss of sweet cream butter.
What does “cultured” mean?
We aren’t talking about visits to the opera or art museums. In the world of dairy, cultured refers to milk that is fermented with lactic acid bacteria (the good type of bacteria!). Basically, we add something that already has an active culture—in this experiment we’re using sour cream—and mix it with milk to encourage growth of these yummy, healthy bacteria. It’s a similar process used to create other dairy products we love, like yogurt and cheese. This used to happen naturally, as cream just sat around for a day or two before refrigeration.
So how do we get butter from this “cultured” dairy?
Great question. We beat it!
Have you ever had whipped cream? That’s cream well on its way to becoming butter. And it is exactly what the name says—it’s whipped until there’s enough air in the cream to make it almost solid. If we kept beating that whipped cream, it would eventually become butter.
In scientific terms, what beating cream—or churning, as it is known—does is break the oil-in-water emulsion. Think of little molecules of fat totally encased in water—this is the cream. As we churn the butter, those protective bubbles of water get broken and pushes the fat molecules together to make bigger and bigger clumps until we have a nice solid piece of butter that is a conglomeration of all the fat (or most of the fat) in the cream.
Think of it like making a snowman—the snowflakes start to stick together until eventually you have a giant ball of snow! The fat molecules in the cream behave similarly.
After we finishing churning, we want to try and get any remaining liquid out of our butter, so we knead it. Kneading is fancy food word for basically pushing and mixing something solid. Here we are pushing and squeezing as much as we can. Then, we rinse our butter, maybe mix in a bit of salt, and then we eat it!
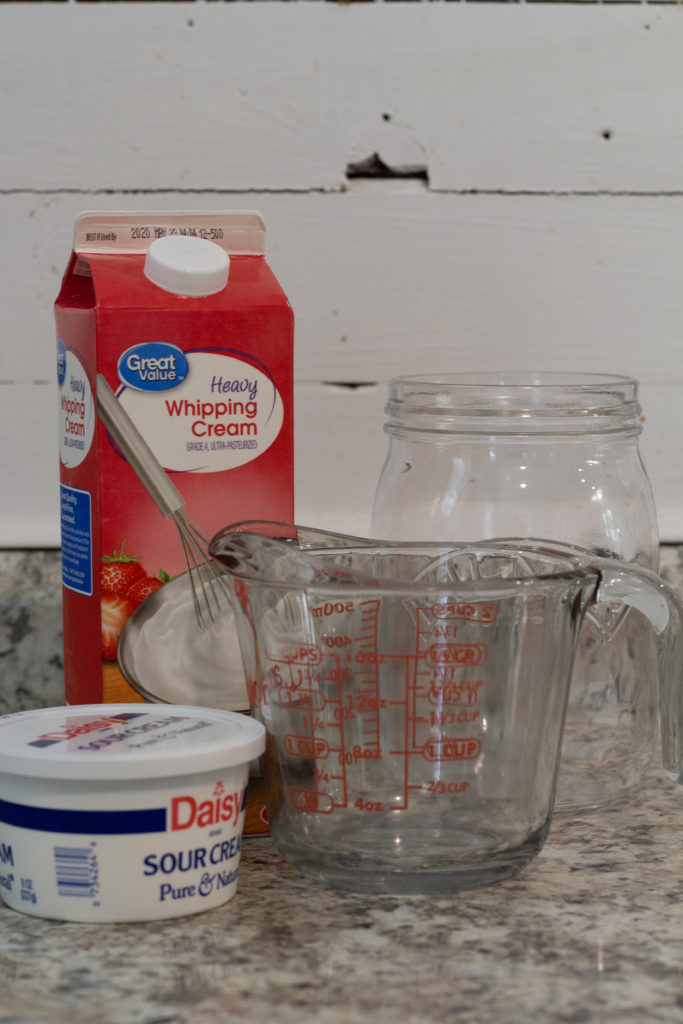
What you’ll need:
- 2 cups heavy cream
- ¼ cup sour cream (full-fat), whole milk plain yogurt, or buttermilk
- ¼ tsp salt
Step One, Day One:
Measure out 2 cups of cream and mix in ¼ cup of cultured dairy (sour cream, yogurt, buttermilk) until combined.
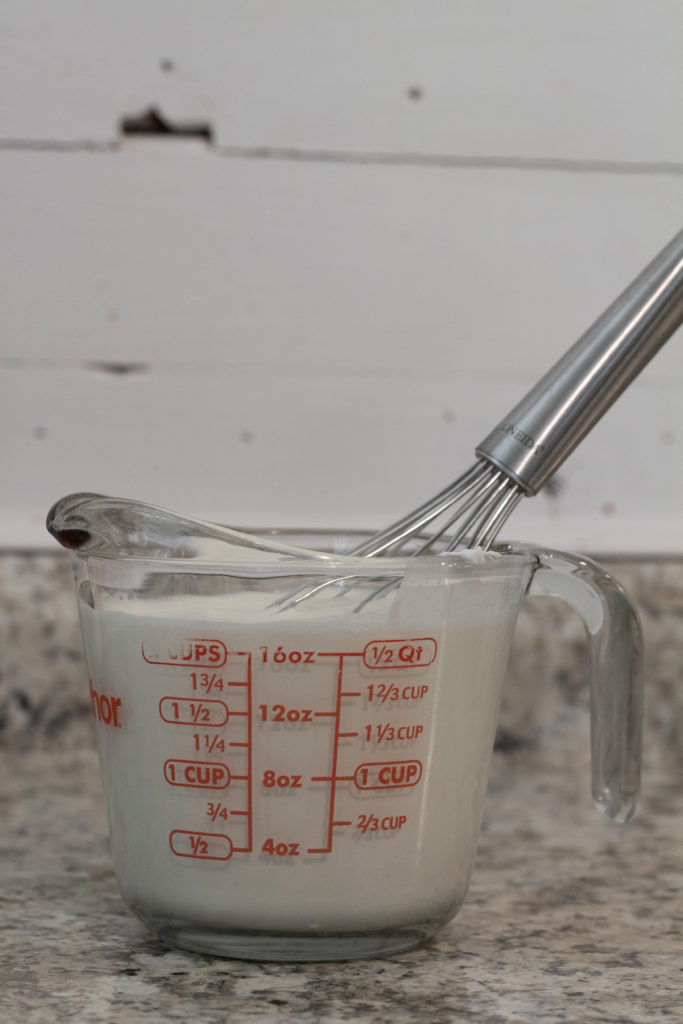
Whisk the cream with the sour cream or other cultured dairy.
Place in a jar or bowl and cover with a towel. Let sit at room temperature for 18-36 hours. It should start to smell tangy and sour.
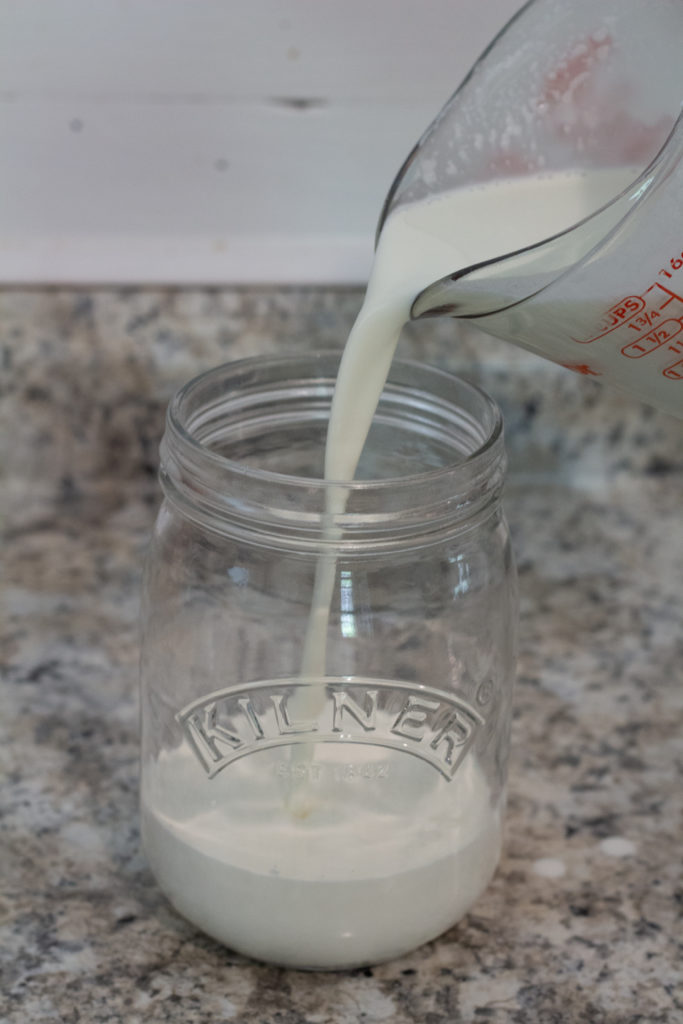
Pour cream mixture into jar.
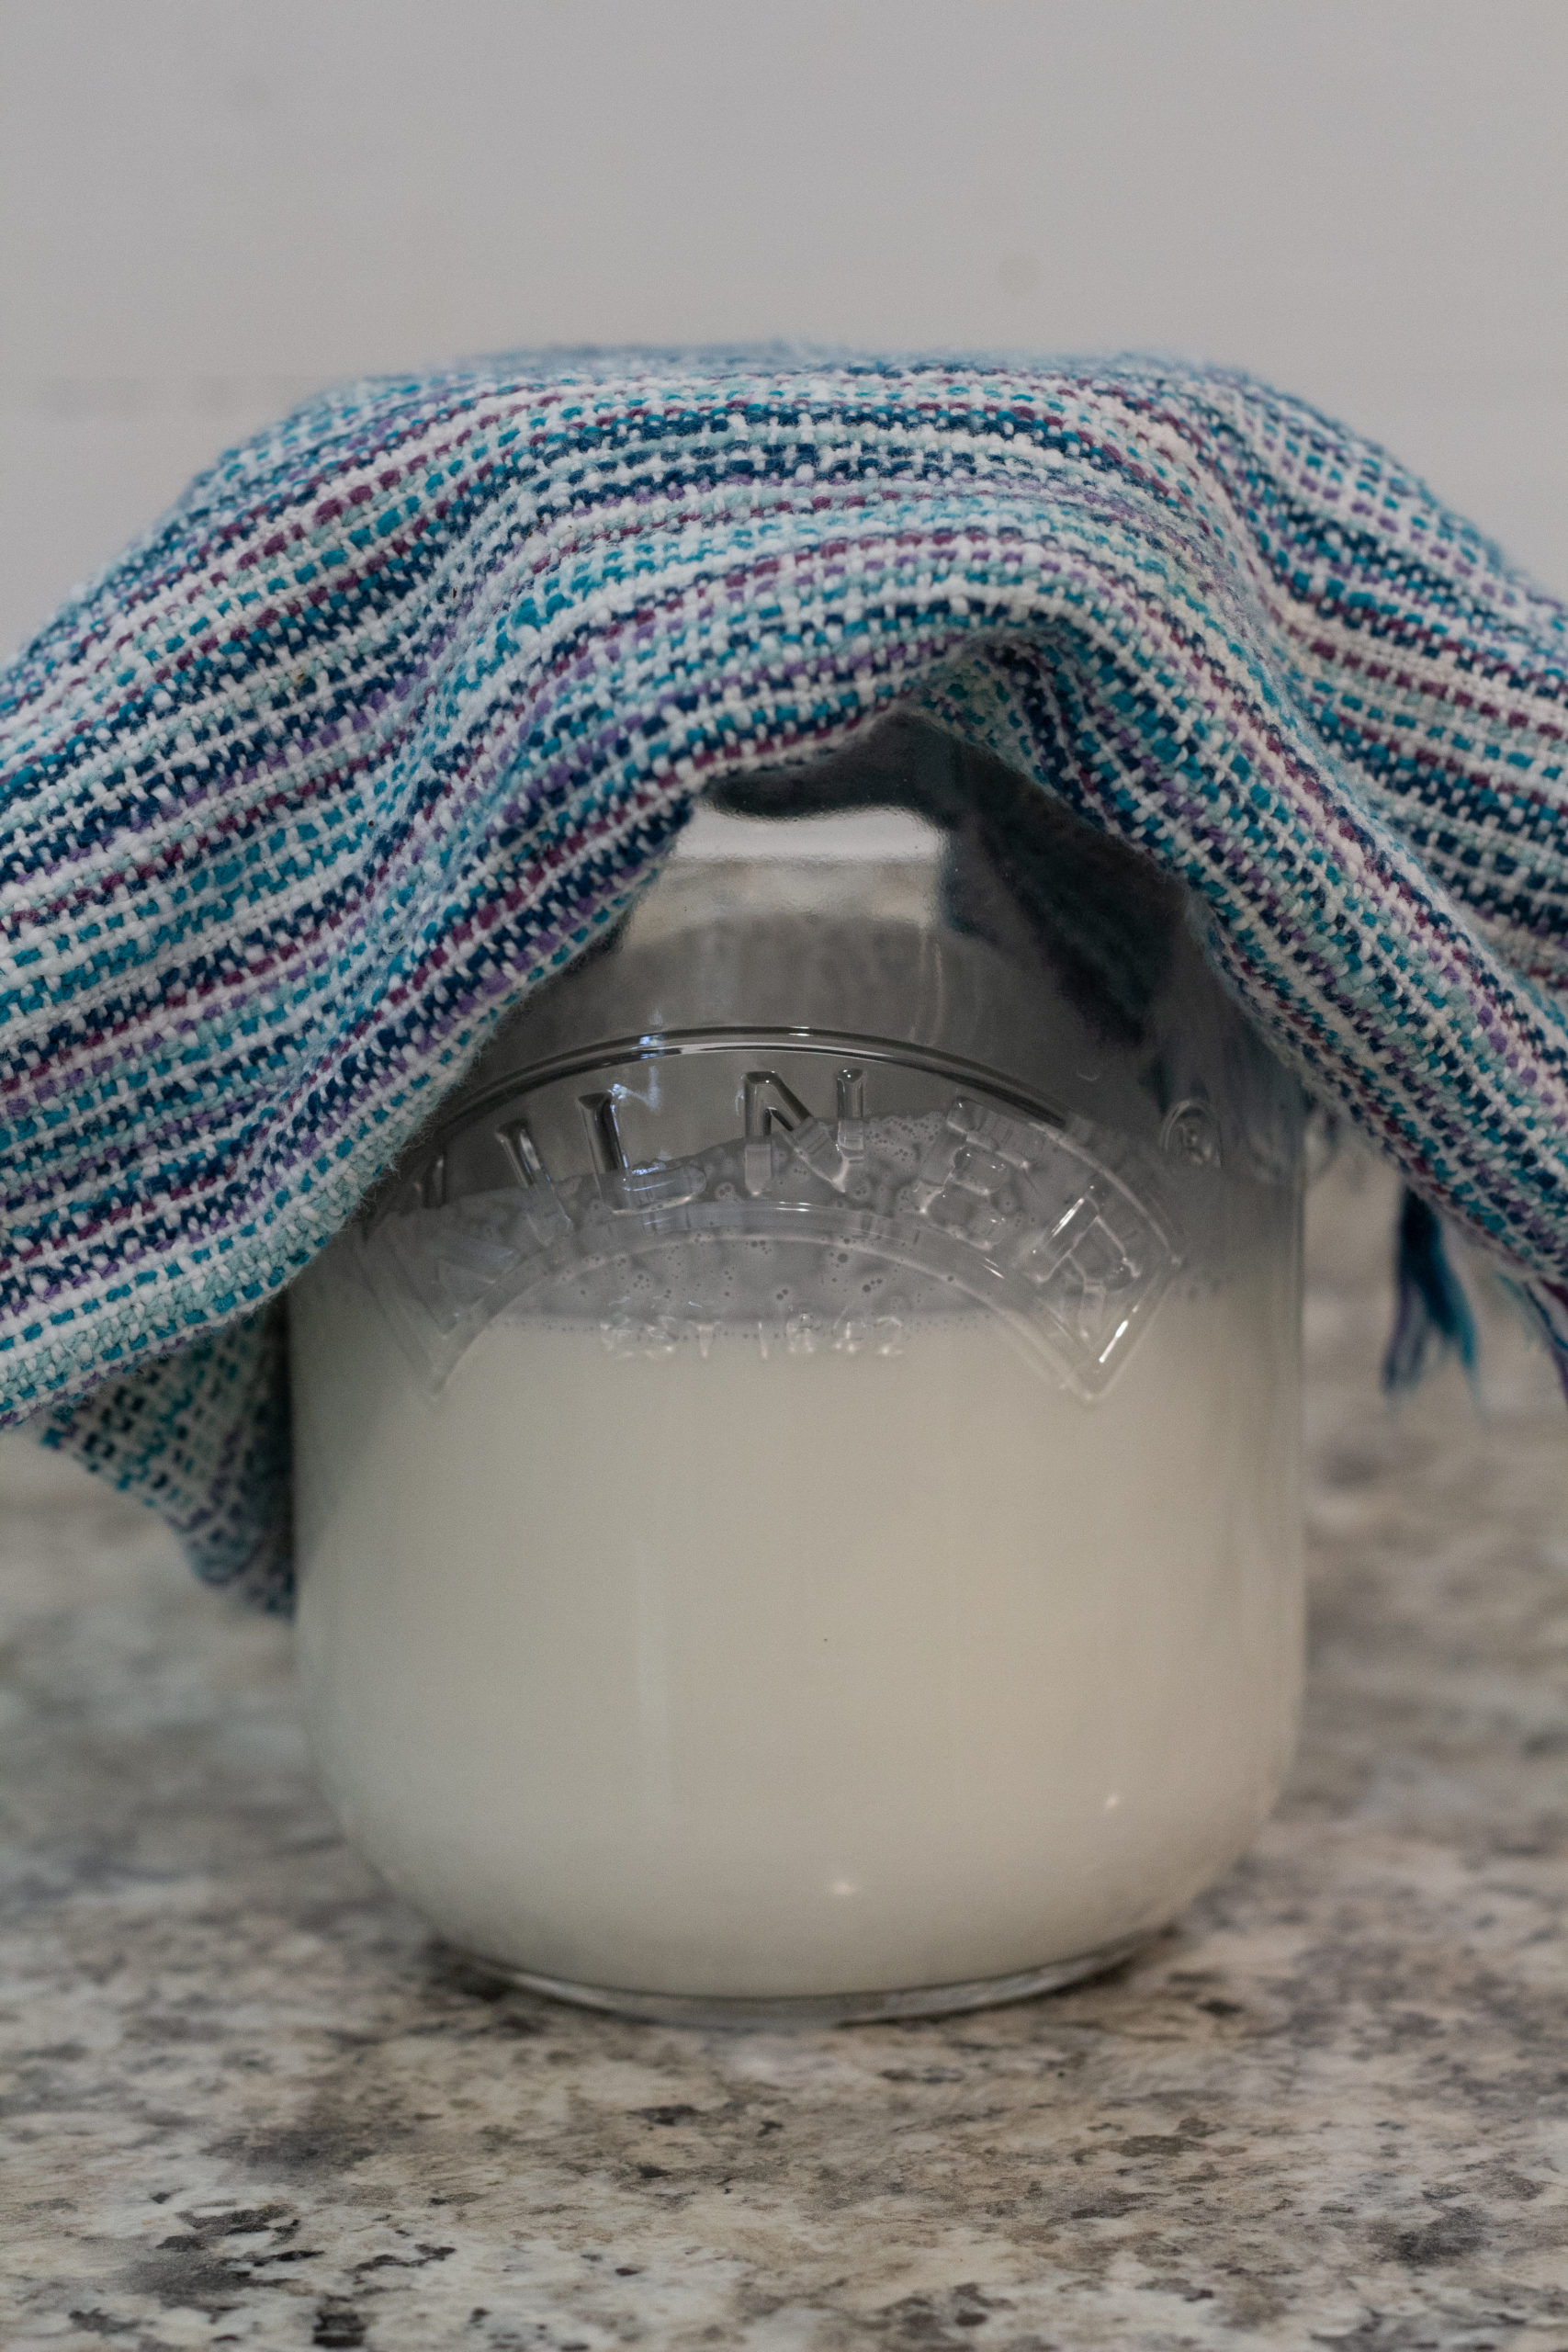
Cover and let rest overnight.
Step Two, Day Two:
After your cream has sat for at room temperature, cover the jar with plastic wrap and refrigerate for 1 hour. Time to churn! There are a few different ways you can do this. If you have an old-style churn, you can beat it with a dasher. If you have a stand mixer, you can beat it with the paddle attachment. If you don’t have either of these tools, you can simply use a mason jar or Ziploc bags. If using bags, we highly recommend double bagging it!
Pour the cultured cream into whichever method you are using. Begin to beat or shake the butter. If using a mason jar or Ziploc bags, proceed to shake vigorously for 15-30 minutes. You may want to have a partner to take turns with!
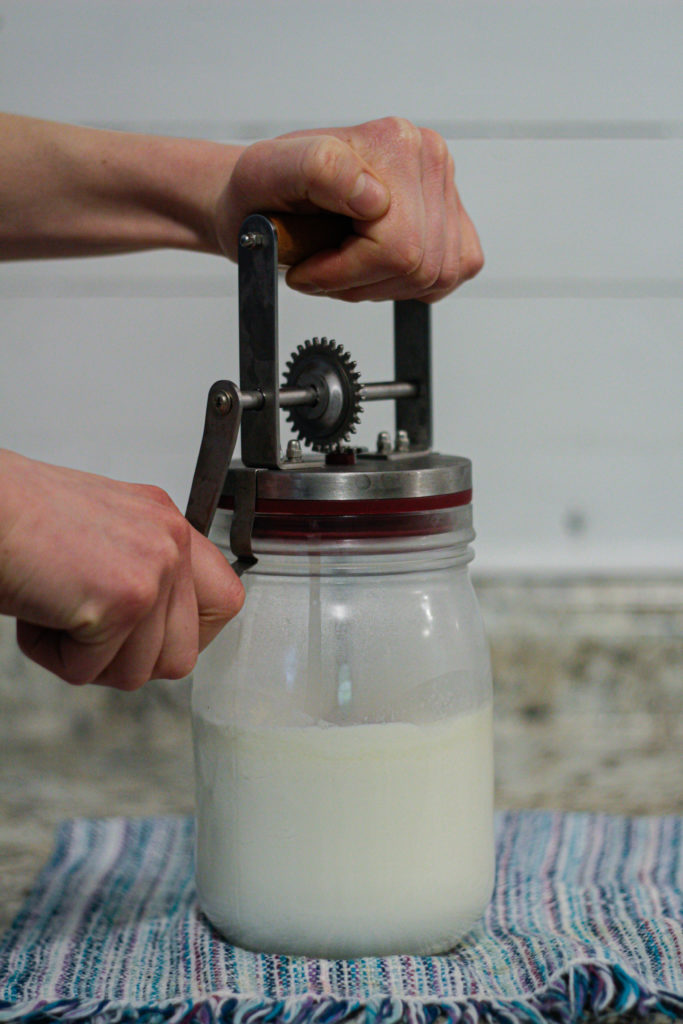
Churn for 5-15 minutes depending on method used.
Step Three:
Place a mesh strainer lined with cheesecloth over a bowl. Pour churned contents into strainer and slowly start to push butter into a ball, squeezing out any additional liquid as you do so. The liquid you are straining out is buttermilk, which you can save to make more butter or some really delicious biscuits!
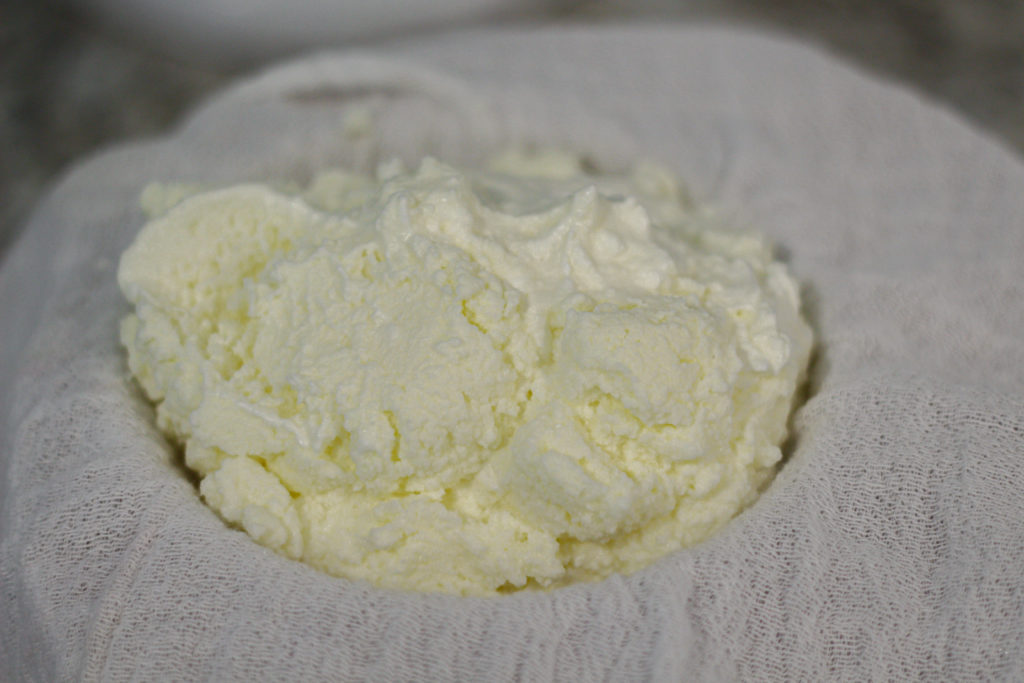
Once butter “breaks”–it will form a curd-like mixture and there will be visible liquid separated from the fat–strain off buttermilk into bowl using strainer lined with cheesecloth.
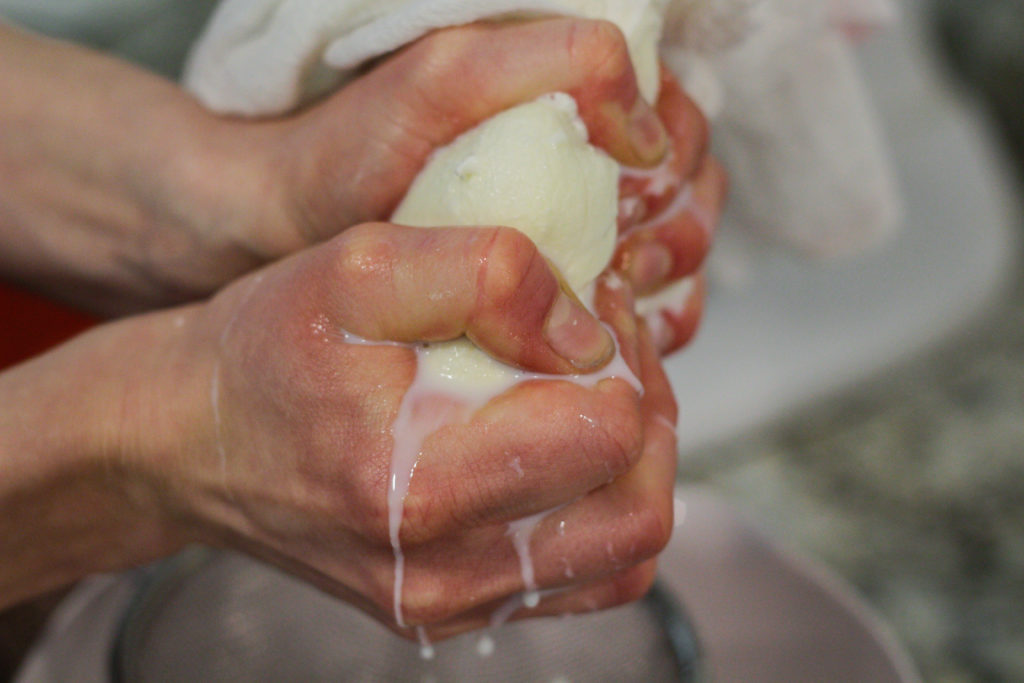
Wrap butter in cheesecloth and squeeze out remaining liquid.
Step Four:
Place the lump of butter in a clean bowl and pour about ½ cup of ice water over it. With a spatula or the back of the spoon, press the butter down into the water with the back of a spoon or spatula. Pour of the water and repeat process until water is clear.
Rinse butter with water and press into ball, squeezing out extra liquid.
Step Five:
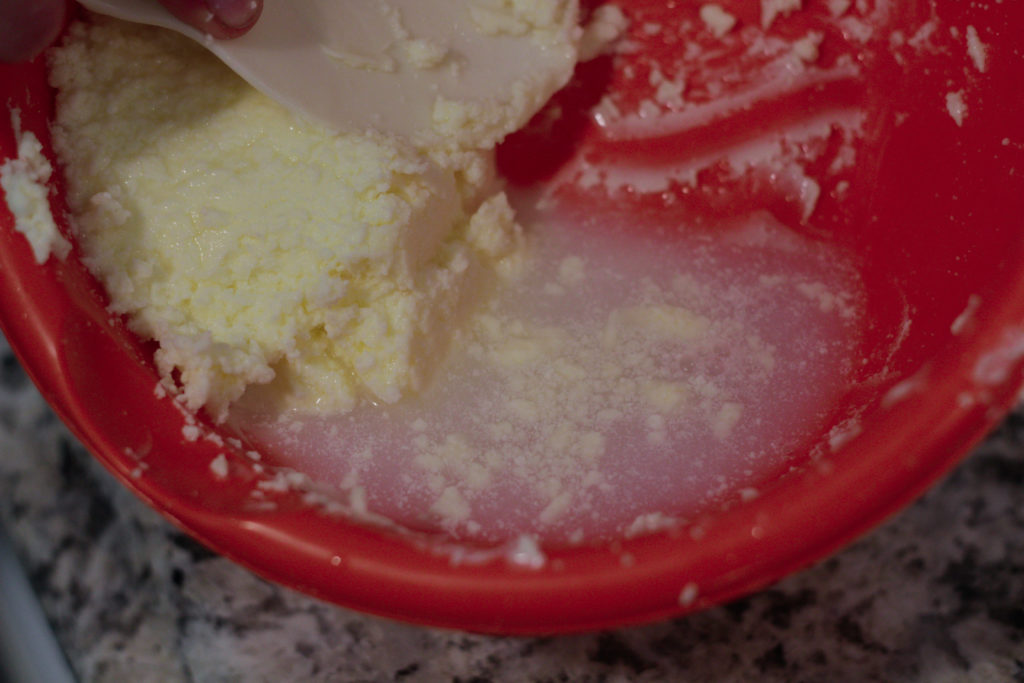
Drain off the water completely. If you’d like, you can add the salt at this time. Sprinkle it over the lump and knead it in with your hands.
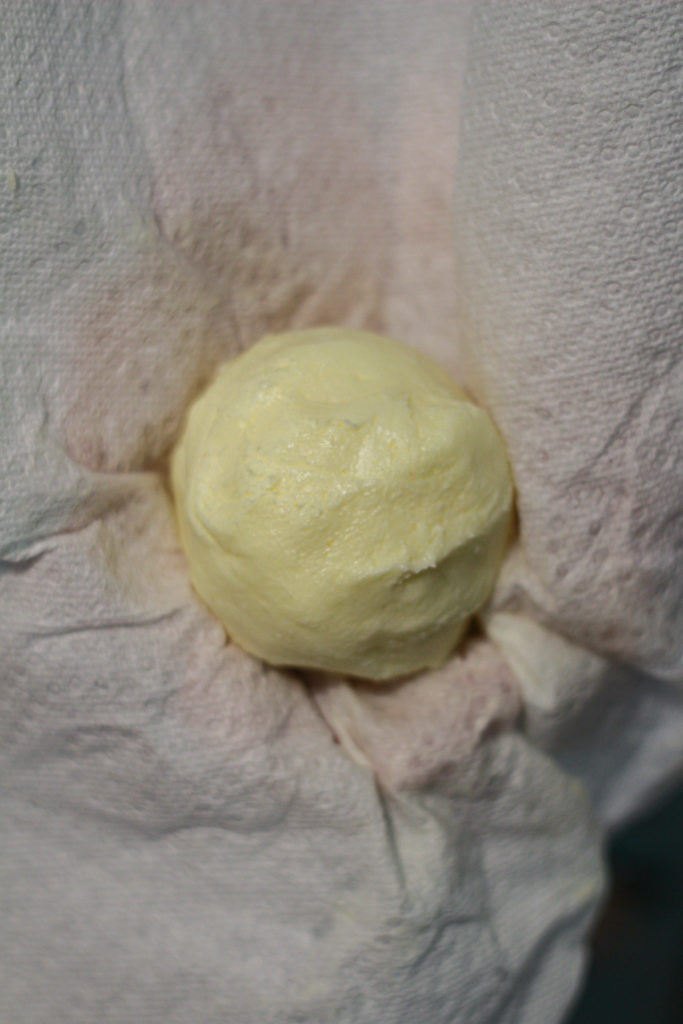
Shape into ball or log and pat dry.
Your butter is finished! Store in the refrigerator to keep it fresh. Your butter should be good refrigerated for 2-3 weeks.
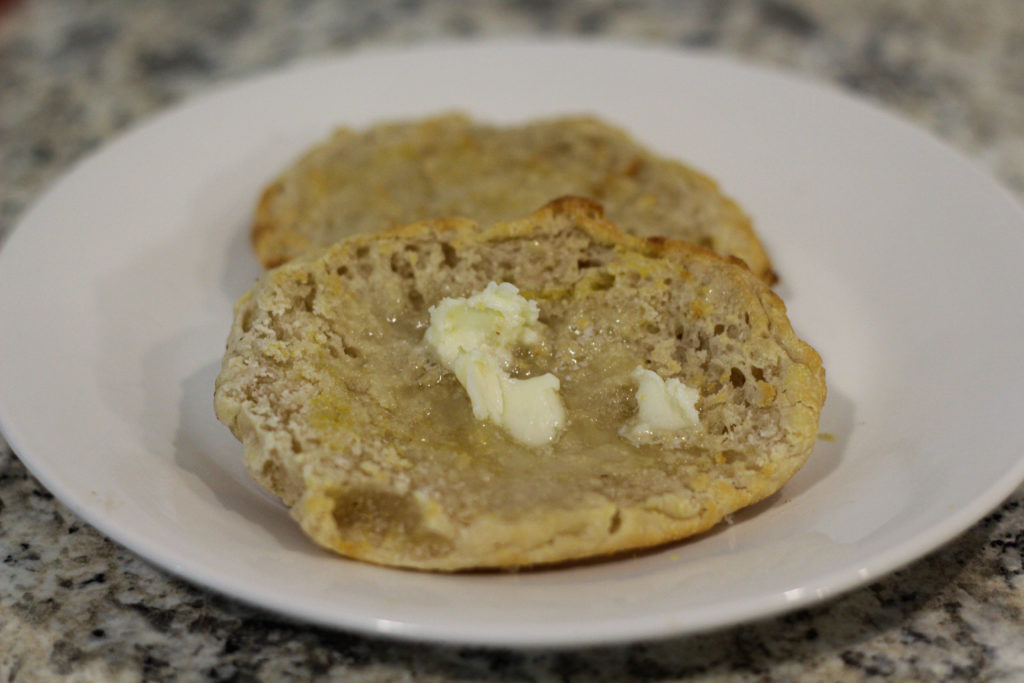
Enjoy on your favorite baked good or use in cooking!
~Kami Ahrens, Assistant Curator
Can’t wait to try this!! Thank you!!
I have two Dasey churns. One is for 1/2 gallon and the other one is for 1 gallon. I regularly churn my own sweet cream and home made soured-cream into butter.
I have a question…. Can I churn store-bought sour cream (the kind that goes on baked potatoes) into butter? If so, how?
Thanks.
While I have never tried, I would have to say no, probably not, as I think the fat content in store-bought is too low. However, you can add heavy cream to store bought sour cream and culture it for a day or two and then churn! You can use 1/4-1/2 cup store bought sour cream per 2 cups cream when culturing. Hope this helps!
Howdy, Ma’am,
Thank you for this note. It is perfect for me. I will try it. But not right away, I still have about 3/4 lb of butter from the last time I churned.
I know a lady who is half Choctaw, who grew up in the REAL old days, out in the country. She taught “Home Economics” classes, one for girls, and one for boys, and also “Marriage and Family” for about 30 years in a Catholic High School ion Oklahoma City.
She would have me come into her class for a demonstration in the boys’ class: I would pour cream into a big glass jar and show the boys just how to gently shake it. The teacher would tell stories of HER making butter that way when she was a young girl. One of the chants she sang included , “Come, Butter, Come”.
I would then show the boys how to grind wheat into flour in a hand-cranked mill. We’d then make biscuits from the flour. By the time the biscuits were done, the butter was churned, washed, and salted. We would all then share in the Feast. They guys really like it, thought it had cool, and enjoyed shaking the butter, grinding the four, and mixing the dough.
I send my best regards.
Phil
I do send my thanks and my very best wishes.
Wonderful! Thank you for sharing. How interesting. We have several variations of “Come, Butter, Come” recorded in our archive. Nothing like fresh-churned butter on warm, homemade biscuits!
Thank you for your note back to me, ma’am.
I LOVE your article and recipe! My dad grew up in the Appalachian Mountains, he was born and raised in the Allegheny Mountains of Pennsylvania in the area of McGee’s Mills. This butter is just what my dear grandmama made! My grandparents lived very humbly. They were farmers and my granddaddy sometimes coal mined. They never owned a gas powered vehicle and their sole transportation was to rig up their Belgium draft horses to a wagon, my granddaddy did this until he was in his nineties. When my dad was a boy they had an ice house and spring house, but they did have electricity by the time I was born.
Years ago I had been trying to make butter like hers when my now departed daddy told me it was impossible. He explained that my grandmama collected her cream throughout the week, and by the time she churned her cream, part of it had become sour cream because their milk products weren’t pasteurized. I’m going to try this. The cultured butter I can purchase at the store pales in comparison to hers.
I also LOVE that you used ultra pasteurized cream for this recipe. Every single recipe I have found says you can only use raw or plain pasteurized, not the ultra. I wish I knew where this wonderful utopia is located where folks can still get regular pasteurized cream at their local stores. You can’t readily get that in northeast Florida. I am going to try a recipe I found by Alex Guarnaschelli, where she uses 2 1/2 cups whipping cream and 1 cup sour cream tomorrow, but I am definitely going to give this a try too. Thank you so much for posting this awesome piece, I am hoping this will be the end of my quest in trying to find a modern method to create that old world taste of my childhood memories. I think I see a search for vintage/primitive butter molds on EBay in my very near future!
What a wonderful memory! Thank you so much for sharing, and please let us know how it turns out!