Another handmade decoration for your rustic Christmas tree! In Appalachia, trees were decorated with things made from easily-accessible resources, such as popcorn garland, scraps of fabric, or things found in nature, like pine cones. As Foxfire contact Hubert Hooper said, “We didn’t use anything that was artificial; it all came out of the forest.” This Christmas tree topper, made from sticks and twine, carries on the spirit of simplicity and resourcefulness that marks the traditions of Southern Appalachia.
Clyde English shared his memories of Christmas decorations with Foxfire students for the Foxfire Christmas book:
“[When we started decorating] at home, we put the decorations up on Christmas Eve and left them up until New Year’s Day. It was a tradition, when I was little, to leave them up until New Year’s. We’d always have plenty of holly. My mother would go out with us and get holly and put it over the mantelpiece, or over pictures in the house. We strung popcorn and made chains to put on our tree, once we started having one.”
Just as it is for many families today, decorating the tree was a special tradition that kids and grown-ups alike looked forward to all year long!
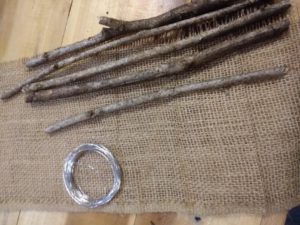
Supplies Needed:
- Jute twine or raffia strands – For this I didn’t have either available so I pulled strands from a piece of burlap I had
- 5 Sticks about same length
- Scissors
- Wire
- Glue
Instructions:
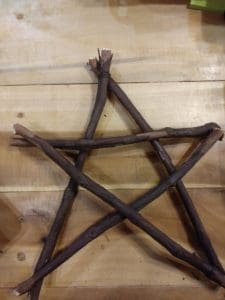
For this project, I wanted a simple handmade rustic star for the top of our Christmas tree. Keeping with the Appalachian tradition, I wanted to use found or recycled items and items already on hand. In the pictures below you will see that I used 2 different types of wire. I recycled a couple of pieces I found leftover from other projects and then pulled out a new roll that I had in my stash. It really doesn’t matter because the wire will be covered up in the end. Even though mine is just a simple rustic star, you could add greenery or berries or whatever embellishments you would like. Get creative!
1. Gather all your supplies.
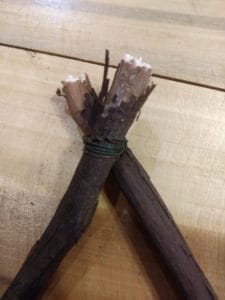
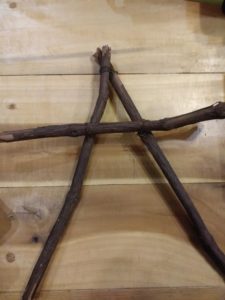
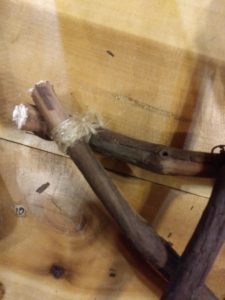
2. Lay out your pieces in the shape you want and using your wire, you are going to wrap the 2 pieces together that make the top of the star. I start by twisting one end of the wire around 1 stick and twisting the loose end around the wire I am wrapping with. I wrap around both sticks several times, and then in between both several times.

3. For the next step, you are going to make the basic A frame for your star. Lay your stick across the middle of your first 2 pieces you just wired together. You may want to make sure all pieces are going to fit how you want them again so you know how high up to place this middle brace. Using 2 more pieces of wire, you are going to wire each side to this center brace as shown below.
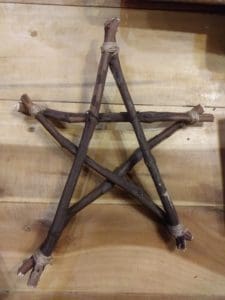
4. Repeat step 2 for all remaining corners until you have all 5 points secured.

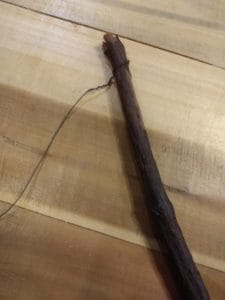
5. Grab your twine (or raffia) and tie one end to the back side of one star point (around the wire) and start wrapping. Wrap around until no wire is visible. Tie it off and tack end with a dab of glue. Repeat for all the star points.
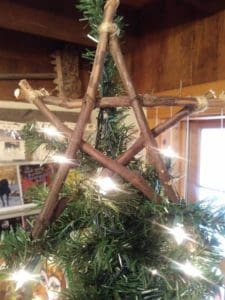
6. Place on the tree and enjoy! You could easily add a loop around the top if you wanted but I just placed the star up in the branches and it sits perfectly.
~Bridgett Gladney